


The Automatic Marshall Compaction Machine is designed to provide a stable and rigid mechanism for producing 4" or 6" diameter asphalt pills used in Marshall tests
| Description | |
The heavy-duty design stands up well to the constant jarring caused by the compaction process. The Compaction Machine features a rotating mold mechanism and a hammer with a beveled foot, which together produce a kneading action when producing test pills. The machine's automatic counter allows the operator to preset the number of blows wanted and will turn off the machine when completed. After the number of blows has been set, the operator can start the machine with a push button and keep track of the number of blows on an LED readout. The counter can be operated on either 115V/60Hz or 230V/50Hz, switchable inside the cover. A cam-action lever operates the integral mold holder to facilitate insertion and removal of the stability mold. Machines can be ordered as 4" or 6" machines, but can be altered to easily accommodate the other size by purchasing a hammer and test molds of the desired size. Each machine includes: the mechanical compactor, an automatic counter, tapered-foot hammer assembly for rotating mold models or a flat-foot hammer assembly for the stationary mold models, (1) stability mold, and (1) package of paper discs.
| 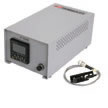 Automatic counter |
| Heavy-Duty, Automatic Single Compactor with Rotating Mold | |
| Description | Model |
| For 4" diameter specimens. 115V 60Hz | H-1364R |
| For 6" diameter specimens. 115V 60Hz | H-1366R |
| For 4" diameter specimens. 230V 60Hz | H-1364R.2F |
| For 6" diameter specimens. 230V 60Hz | H-1366R.2F |
| For 4" diameter specimens. 230V 50Hz | H-1364R.5F |
| For 6" diameter specimens. 230V 50Hz | H-1366R.5F |
| Heavy-Duty, Automatic Single Compactor with Stationary Mold | |
| Description | Model |
| For 4" diameter specimens. 115V 60Hz | H-1364 |
| For 6" diameter specimens. 115V 60Hz | H-1366 |
| For 4" diameter specimens. 230V 60Hz | H-1364.2F |
| For 6" diameter specimens. 230V 60Hz | H-1366.2F |
| For 4" diameter specimens. 230V 50Hz | H-1364.5F |
| For 6" diameter specimens. 230V 50Hz | H-1366.5F |
| Specifications | |
| Inspection | |
| Your Marshall Automatic Compaction Machine was thoroughly inspected before it was shipped and should be ready to operate as soon as you have completed the set-up procedure. Notify Mfg. Co. or your local agent and file a claim with any carriers involved if you find any damage to the machine. | |
| Physical Specification | |
| Shipping weight | 400 lbs. (180 kg) |
| Overall height | 65" |
| Width & Depth dimension | 24" X 21" |
| Free fall of hammer | 18" |
| Power Supply | |
Check that your machine has the correct voltage for your local supply. | |
| Fuses | |
| The Marshall Compaction Machine uses a time-delay fuse, which is fitted into the H-1334 Counter used with the machine. The replacement part number is H-1339.13. |
| Initial Installation |
| Remove the packing list and verify that all parts have been received. Normally you will receive one crate, which is a tall box. Inside the crate you will find the following items: pedestal, compactor, hammer, mold, and counter. Set the machine & pedestal up at the place it is to be used in the laboratory and then check that it is level by placing a spirit level on the base plate. If it is not level, adjust the floor mounting surface for the machine. Check adjustment of H-1360 proximity sensor (H-1334A/1334B photo sensor).
|
| Operation |
| Test Specimens |
| Prepare at least three specimens following procedures outlined in ASTM D1559, D5581, D6926, D6927 and AASHTO T245. Thoroughly clean the specimen mold, and face of the compaction hammer, heat them according to specification, and introduce the mixture as explained in the standard. Replace the collar, place the mold assembly on the compaction pedestal in the mold holder, and preset the specified number of blows (to each side of the specimen) using the H-1334 counter’s preset switch. Actuate the counter to begin compaction, which will automatically end at the preset number. To make mold removal and reversal easy lift the entire hammer assembly and rotate the top weight ¼ turn either way allowing the release wedge to rest on top of the guide support while you load a new mold and sample. After loading the mold rotate the release wedge to the back and the hammer will be in place to begin compaction. The following figure shows these positions. |
| Maintenance |
| The gearbox is filled with oil and does not normally require further attention. If necessary to add oil use AGMA Grade 8A-EP, SAE 250. Pillow block bearings should be lubricated regularly with multi-purpose or heavy duty grease through the grease fittings provided. Care must be taken to avoid handling the hammer rod(s) with dirty gloves – keep the hammer rods clean. The compactor’s exposed, moving metal parts should be kept clean and lightly oiled. |
A collection of great CSS tools and resources can be found at html-css-js.com: code beautifier, cheat sheet, style generators, useful links etc.


Verify Torque smart Bluetooth® torque wrench adaptor
Hydrajaws - HY010004-0, HY010005-0, HY010006-0
Upon Request
Do you have a question?
min 10 ch