| Features | |||
| |||
| Standard Delivery | |||
| |||
| Supply schedule | |||
| |||
| Specifications | ||||
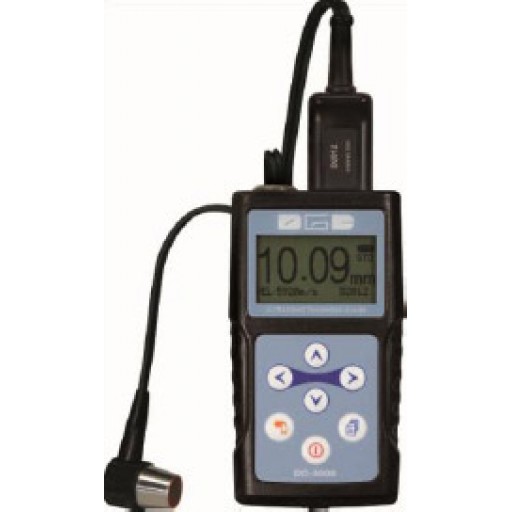
| DC3000 | DC3020 | |||
| Measurement mode | T-E | -Standard measurement: For Normal thickness measurement. -Minimum measurement: For curved surface -Differential measurement: Displays the difference from the actual thickness measurement or from a user entered reference value -Average measurement : 2-9 point selectable -Limit measurement: Min. Max setting and alarm | x | x |
| T-E | The metal wall thickness is accurately and quickly measured in spite of surface coating | x | x | |
| Scan | Thickness value at 10 measurements per second while also display actual thickness (Ideal for high temp. thickness readings) | x | x | |
| Probe identify | Auto | x | x | |
| Probe zero | Auto at power up and continuously during the measurement | x | x | |
| Gain adjust | Auto gain adjustment Manual gain adjustment: low, standard and high | x | x | |
| Memory | 5000 groups | - | x | |
| Output | USB to PC | - | x | |
| Measuring Range | E-E : 3-25mm T-E: 0.65-400mm(range depends on probe-material combination) | x | x | |
| Resolution | 0.01mm (0.001 inch) for thickness up to 99.99mm 0.1mm ( 0.01 inch) for thickness above99.99mm | x | x | |
| Information Display | Measurement reading, Probe type, Velocity, measurement mode, measurement Symbol, Battery | x | x | |
| Velocity range | 9 material velocities are stored for selection, or entre the new velocity manually (1000m/s-9999m/s) | x | x | |
| Vel. measurement | Simply calibrate when a material’s velocity is unknown | x | x | |
| Display | 128 x 64 graphics LCD monochrome | x | x | |
| Battery Type | 2 AAA Alkaline | x | x | |
| Battery life | Up to 50 Hours (without Backlight) | x | x | |
| Shut off | Auto, 2Min., 5Min., or never shut off delectable | x | x | |
| Work. Temperature | -20?-50? | x | x | |
| Unit | mm/inch | x | x | |
| Dimensions | 115mm x 64mm x 27mm | x | x | |
| Weight | 220g | x | x | |


Do you have a question?
min 10 ch